I read an article originally posted on the workremote.us blog following a complimentary tweet from Andreas Klinger on the design of Andy Tryba’s remote office. He got a lot of requests to write a post instructing others on how to make their remote office ‘Gold Standard’; a sort of ‘how to’ if you will. In this article we explore his thought process and planning of his ‘Gold Standard’ remote office.

His Initial Design Considerations
Andy works with thousands of remote workers, so he needed his office to be optimised for remote collaboration. But he states that the typical 1:1 video wasn’t the only use case needed, as he typically has three different scenarios to contemplate:
- Optimise for remote video calls 1:1 or 1:N (typical)
- Optimise for N:N remote video calls – including multiple people physically in my office (a bit more challenging)
- Optimise for the use case 1 or 2 while using the whiteboard to brainstorm (also a bit more challenging)
His Other design considerations:
- Great HD audio quality all around the room to avoid the ‘near/far’ mic sound
- Great HD video setup with proper orientation
- Limit wires around the office – clean setup – particularly in the middle of the room
- Physical whiteboard (He still hates digital ones)
- Ability for others to wireless present on the screen/TV
- Use only PC-based video conferencing solutions – not fixed room solutions (innovation curve is faster on PC-based/software than fixed room units)
His Layout

He wanted a space that he could use as a ‘normal’ office for in-person customer visits, but also optimise the room for remote work/video conferencing. The first part, he says, is easy, of course. For the video conferencing piece, the layout of the TV, camera and desk were the main considerations.
He said to make the layout work for video conferencing – the camera and TV needed to be directly in front of the desk. Which he states this was a challenge since the space is a rectangle with windows on 2 sides.
His first thought was to hang the TV on the wall with no windows (a typical configuration). But if he would have done this – the desk would have had windows behind it.
He said that people make this mistake often – if you orient a desk with windows behind it – the video camera struggles due to the bright light.
Instead (and counterintuitively) – Andy believes a TV stand in front of the window ended up being the right layout. This way – the desk would be along the far wall without windows – avoiding the lighting issue and taking advantage of the natural light in front and besides his desk.

His Camera Setup
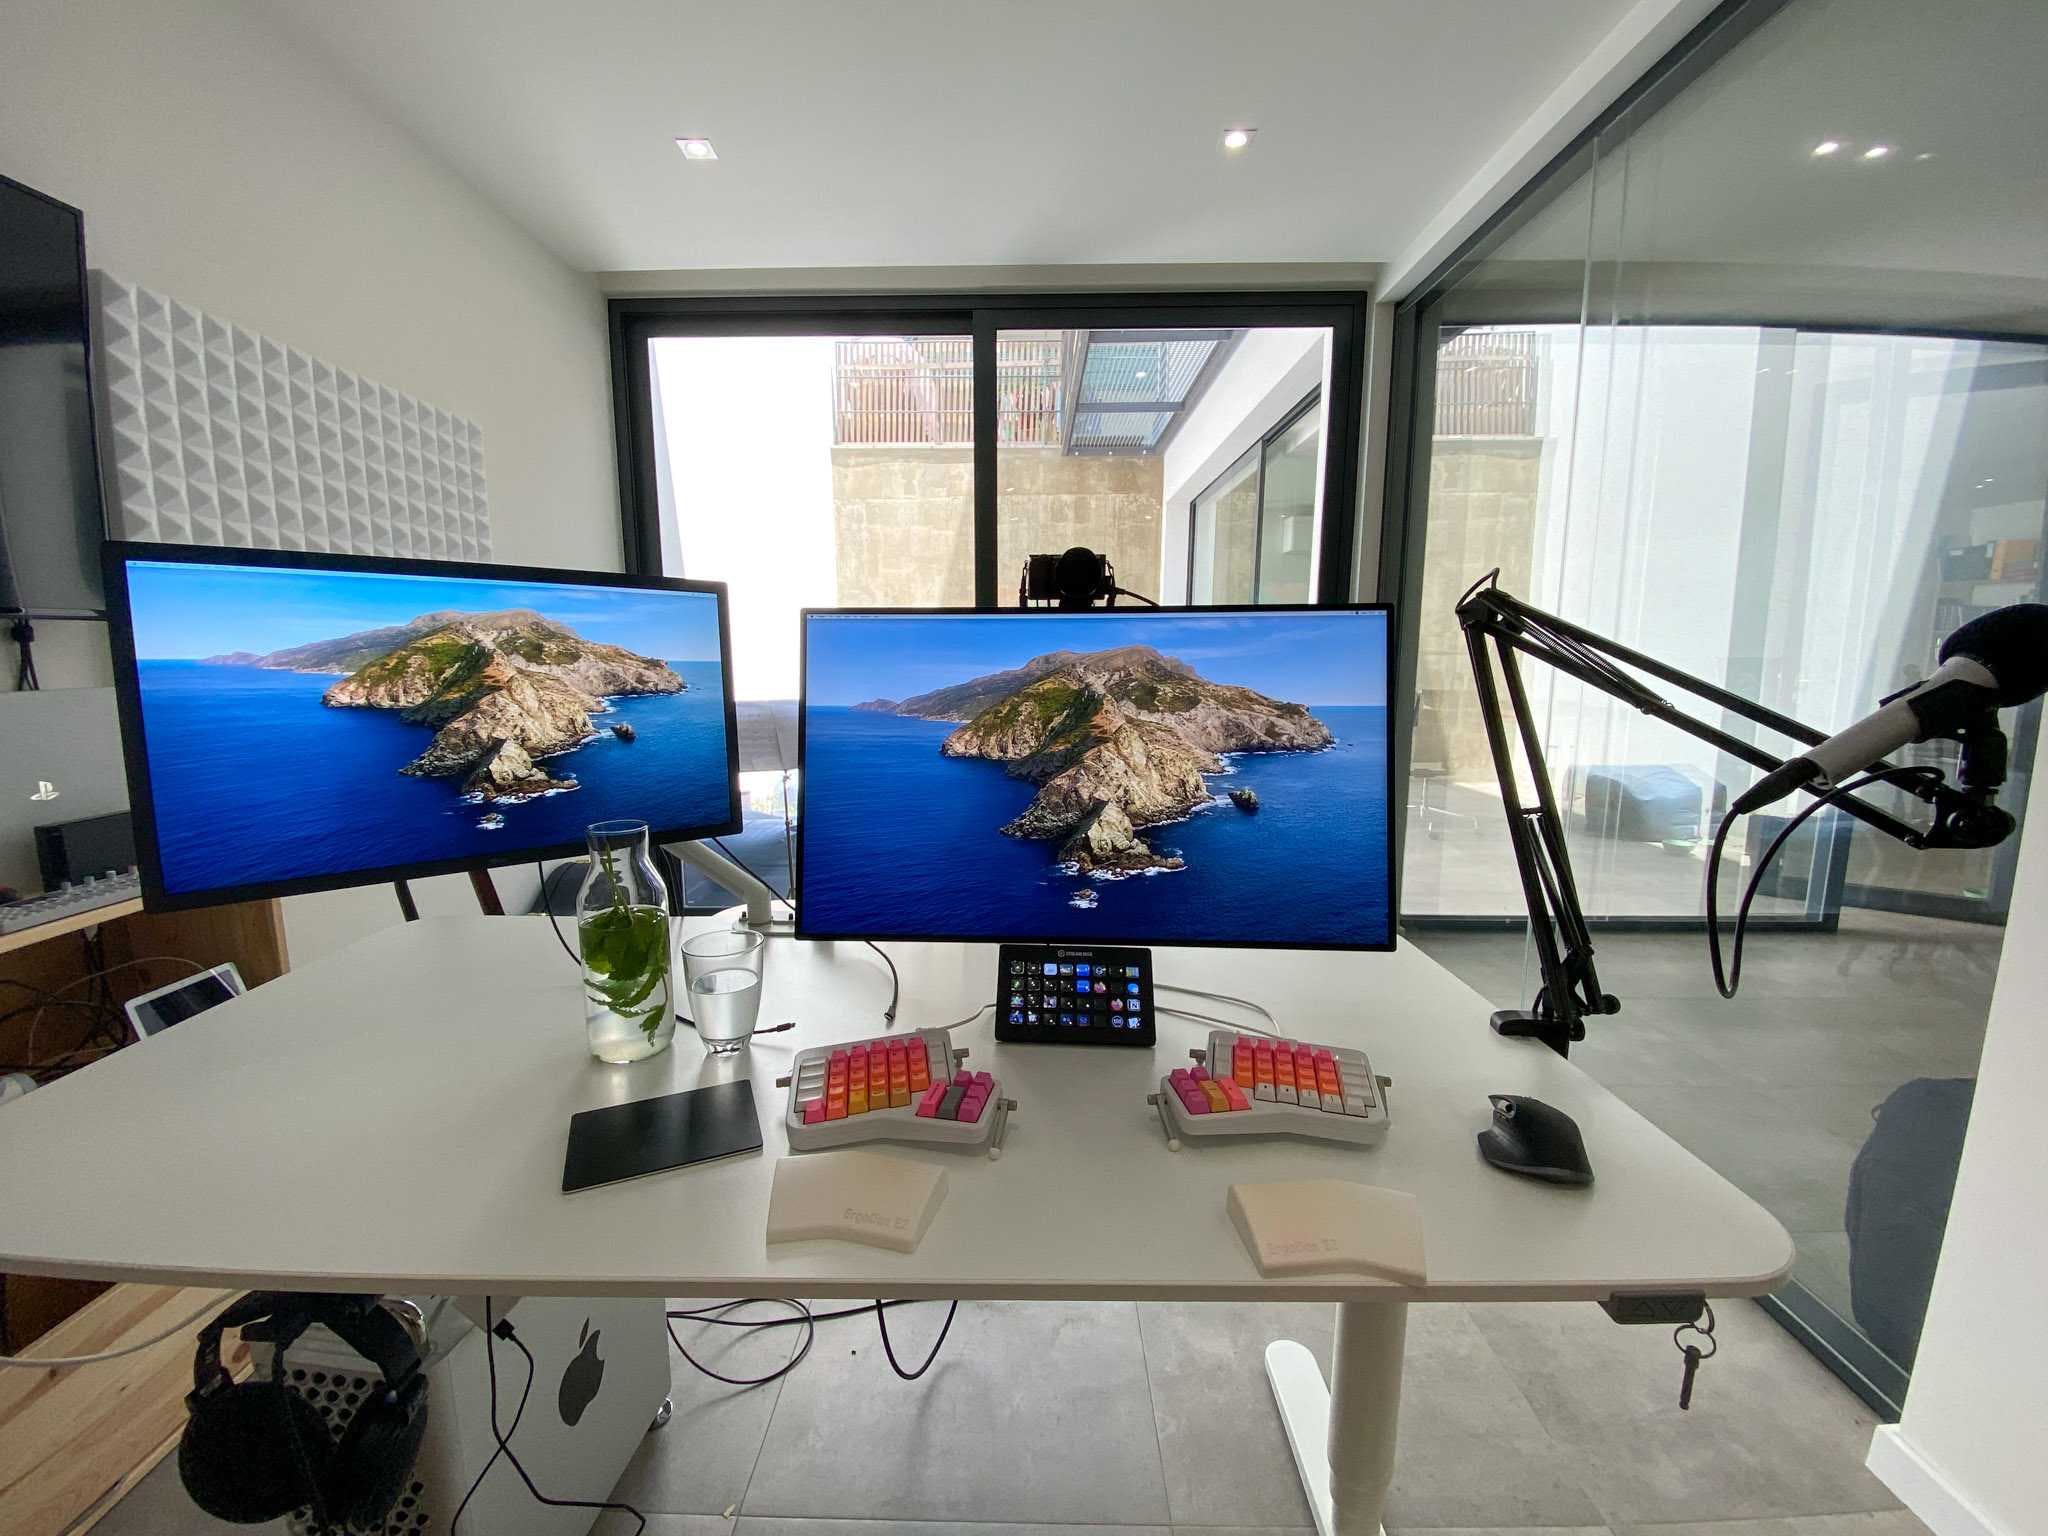
Andy removed a glass shelf from the TV stand and mounted the camera directly on the arm just below the TV
He then raised the shelf so that the camera lens was exactly at eye level when sitting at his desk (see his other article about the importance of camera orientation).


For the camera itself – Andy knew he needed an HD webcam that had a 10x zoom – since the camera is 15 feet away from his desk. He also wanted the camera to have the ability to rotate and focus on various spots in the room, which would enable him to take video calls from the couch, chairs or even his treadmill.
It also needed to have the ability to zoom out, so he could have meetings with multiple people in the physical room – whilst being visible to others on camera.

He chose the Logitech PTZ – and he says it works perfectly for all the use cases. The pre-settings on the remote are also great to automatically click to various spots/configurations.

Andy states that the only issue he has with this camera is when it resumes from standby. When it resumes – rather than it spinning and rotating into place first before turning the camera on, it first turns the camera on then spins and rotates into place. This creates a dizzying panorama effect for the people on the other side of the video. He thinks this is a bug – but Logitech claims it’s a ‘feature’. Andy thinks ‘Classic debate of bug vs feature maybe….’.

For most of his meetings – someone is displaying content. If a person in his office wants to display on the TV to the remote group – they simply login to Zoom and share their screen (which shows up on Andy’s TV as well as to others).
If they are just displaying locally to me – I have an Apple TV mounted on the back of the TV to AirPlay.
His Audio Setup
The next challenge he said was the microphone. Andy’s office isn’t that big –but he wanted to be able to do calls in various spots around the room in addition to having multiple people in the office during calls.
Andy knew one central mic would not be enough, because of the near/far effect and poor audio quality.
He originally thought he needed to have multiple mic pods. He mentioned that there are a ton of mic pods and mic extensions you can find on the market, but most are wired together from the primary pod base, and they all look terrible, he said. He also said that they would also require him to run wires to various spots in the office.
He also considered the type of mics that hang from your ceiling – which would have worked. But again – he said they look terrible and are difficult to install.

He then came across an innovative company called Nureva. They invented a great (but extremely expensive) microphone/speaker called HDL300. This mic is mounted to the wall and breaks up the room into over 8,192 virtual microphone zones.
These virtual microphones basically detect where audio is coming from – and amplifies only those zones. He said this enables him (or others in the room) to be heard clearly from anywhere in the room – as if next to a microphone.
Andy thinks it’s a very, very cool innovation so he splurged a bit on it.

The HDL300 has a small box that plugs in via USB into his iMac. He said this is great since it’s simply a USB device – and it is automatically picked up by all the video conferencing software he uses.
His Whiteboard Collaboration
Andy thinks he is a little old school when it comes to software whiteboard solutions, as he is not a lover of them. However, he said this has improved slightly with his iPad Pro and Apple Pencil – but he still thinks nothing beats a large physical whiteboard. And when others are in his room brainstorming – he thinks that having a full-size whiteboard is important.

Andy said that he could have purchased a full-size digital whiteboard – but they are super expensive – and they’re a bit of a pain to plugin to various video conferencing software.
So, the solution he opted for instead was simply to mount his iPad on a stand and point the camera towards the physical whiteboard. He then logs in to the iPad as another user in a Zoom meeting – and shares the video. He said It works great, though his penmanship is another story.
His Software
He uses a variety of different remote collaboration software – Zoom, Slack, Skype, GoToMeeting, WebEx, etc. He said his company has now standardised across the board, however some of their customers and others use different platforms.
So simply using the PC as your ‘hub’ works great, allowing you to be flexible and use any of them in your office setup. He said his TV is connected to his iMac by HDMI and treated as an extended display.
He’s tried various ‘fixed room’ setups in the past – but found them largely inflexible. This includes Zoom Rooms, LifeSize, Telepresence, Halo Rooms, etc. He thinks that having a PC-based model connected to a TV has several advantages:
1) Has the ability to drag documents back/forth from the screen
2) Doesn’t need a second PC to power the Zoom Room
3) No need to pay extra for a Zoom Room account
4) Is less complicated to setup
Though he uses many – his favourite software for remote teams (by far) is a program called Sococo. It’s the only software he’s seen that can help build remote team culture.
He says that for whatever reason – virtually ‘seeing’ your team sitting around a table develops a sense of connection that can’t be matched with little green/yellow/red dots on a Slack list. He says that the ‘visual proximity’ also encourages watercooler talk and quick video syncs.
Andy loved this company so much that he bought it – and he is now making it 10 times better (developing ‘rich presence’, making it into a platform to plugin to Zoom/Slack/calendar, adding personalisation, etc).

His Summary of Parts
Hardware:
- Camera: Logitech PTZ camera
- Microphone/Speaker: Nureva HDL300
- TV: 60” Samsung
- PC: iMac
- AppleTV
Software:
- Video collaboration: Zoom, Skype, Slack, GTM, others
- Remote team culture: Sococo
Andy’s Conclusion
Keys to setting up any remote-first office:
- Output equals Professionalism: Configure your layout to optimize for professionalism. Assume you need to close $1M deals on video – so recreate a virtual in-person experience. All elements matter to create a professional look – where you put your desk, background, lighting, camera, microphone, etc.
- Audio is more important than video: If video fails, you keep going – if audio fails, you end the call. Splurge on good audio setup. And based on your use cases – there are various options like virtual microphones.
- Video orientation is more important than video quality: Eye-level camera setup with proper distance is the key to a great video call. HD is nice – but irrelevant if you don’t have the right orientation. Cameras that rotate and zoom can be great flexible options to achieve the perfect orientation.
- PC-based software setups are better than fixed room: Innovation occurs faster on the PC-based solution. And using your PC as the main hub enables you to use a variety of collaboration software instead of 1 fixed ecosystem.
- Collaboration is more than just talking: Focus on productivity and culture building. iPads are good tools to ‘extend’ your collaboration to physical whiteboards. Applications like Sococo are great to drive impromptu ‘watercooler’ discussions to get more out of your newly built space.
He says that he is not sure if this setup is the ‘gold standard’ – but after 15 years of trial and error, this setup works great for him. If anyone has additional ideas on how to make his setup even better – he’d love to hear them! You can reach him on Twitter – @andytryba
How Job pimped his home office for maximum productivity